Monday, June 8, 2009

Kitchen Spotlight: Emile Henry Bakeware

In this week’s Kitchen Spotlight, I want to share my secret for perfectly browned quick breads, juicy meatloaf, and evenly cooked casseroles. Of course, the ingredients you use play a big part in your kitchen success, but the tools you use once you’re in the kitchen are equally important!! The only bakeware that I use in my kitchen these days is Emile Henry. The company has been making their amazing glazed ceramic cookware in the town of Marcigny in Burgundy, France, since 1850.

According to the company’s website, “Ceramic is by far the best material for successful cooking and baking! Only ceramic is able to diffuse the heat slowly and evenly, to create perfectly browned gratins, tasty lasagna, and succulent cakes.” Emile Henry’s signature glazed ceramic is indeed very versatile. Dishes can go from the freezer, to the oven, and then to the dishwasher…and the cookware is also microwave safe. Best of all, the shiny glaze doesn’t scratch, is chip resistant, and also acts as a natural non-stick surface. That means clean-up is a BREEZE!

My personal Emile Henry collection includes a loaf pan, an 8x8 square baker, a pie plate, and an oval gratin dish. The loaf pan makes quick breads that don’t stick and come out perfectly browned and evenly cooked every single time. The square baker is great for evenly cooked cakes, moist brownies with chewy edges, and small casseroles. The gratin dish is designed to make homemade au gratin potatoes, but I use it for a casserole dish with excellent results as well.

I can’t say enough good things about Emile Henry products…I LOVE mine!! If you’d like to add a piece or two of this heirloom cookware to your kitchen, you can find it at Williams-Sonoma, Sur la Table, and Crate & Barrel. Prices average from about $35 for the loaf pan to $70 for the 13x9 baker. In my experience, you can also find Emile Henry products deeply discounted throughout the year at Williams-Sonoma outlet stores. We like to give the following set as a wedding gift to friends and family: an Emile Henry loaf pan, a package of some yummy quick bread mix, a set of spoonulas, and a set of pretty dish towels.

Sunday, June 7, 2009

Recipe of the Week: Not-Your-Average Meatloaf

Sometimes comfort food is just what you want and need...food that reminds you of your childhood, simpler times when all you had to do was show up and dinner was right there waiting for you ;)! For many people, meatloaf is high on their list of comfort foods. Yet some people turn up their noses at meatloaf. I think I know why.


Meatloaf gets a bad rap because it can be...how do I say this nicely?...a bit BORING! It doesn't have to be dry and boring , though. I make a killer meatloaf that makes converts out of even the staunchest of meatloaf haters. This recipe is an adaptation of a recipe that I originally found in a cookbook by famous Cajun chef Paul Prudhomme. 


I just couldn't make the recipe as it was originally written, though...it contained a STICK of butter and was made with fattier ground beef. But the recipe sounded so tasty that I figured out how to keep the essence of the recipe and still be kind to my heart...and my butt!


Not-Your-Average Meatloaf

Makes 6 servings

Ingredients:

  • 1 tbs Cajun seasoning of choice. (I normally use Chef Paul's Meat Magic)
  • 2 bay leaves
  • 1 tbs. Land o Lakes light butter w/canola
  • Small yellow onion, chopped
  • 2 ribs celery, finely diced
  • 1/2 of a green pepper, diced
  • 2 cloves garlic, minced 
  • 1 tbs. Tabasco (I especially like the garlic variety)
  • 1 small can evaporated milk
  • 1/3 cup ketchup
  • 1 lb. ground turkey (93% lean)
  • 1/2 pound lean ground beef (93% lean)
  • 2 eggs, lightly beaten
  • 3/4 cup seasoned breadcrumbs

1. Melt the butter in a large non-stick skillet over medium heat. Add the veggies, Tabasco, bay leaves, and seasoning.  Saute about five
minutes, until onion is translucent.

2. Add the evaporated milk and ketchup to the veggies; stir. Cook this mixture for about 2 minutes. Remove the bay leaves and let the mixture sit and cool.

3. Preheat the oven to 350°.

4. Put the ground turkey and beef in a large bowl. Add the eggs, the cooked veggie/milk/ketchup mixture, and the bread crumbs. Mix by hand until everything is
just combined. Don't overmix or your meatloaf or it will come out tough!!

5. Put the meatloaf in an ungreased non-stick loaf pan. Bake for 30 minutes. Turn the oven up to 400° and cook for 30 more minutes.

This meatloaf is full of spicy flavor and has a great texture! I usually serve it with mashed potatoes and corn on the cob. Another good thing about this recipe is that the leftovers taste even better the next day!

Friday, June 5, 2009

Foodie Hall of Fame: Rao's Tomato Basil Sauce

This week's inductee into my personal Foodie Hall of Fame is Rao's Tomato Basil sauce. Gasp! A JARRED pasta sauce is hall-of-fame worthy?!?!? Yes...this amazing sauce really is that good! I have my friend and fellow foodie Andie to thank for first introducing me to this amazing sauce a couple of years ago. All it took was one try and this is the ONLY jarred sauce that is allowed in my kitchen!

Don't get me wrong...I love to cook homemade tomato sauce when I have the time. Giada De Laurentiis has a recipe for a KILLER pasta alla Amatriciana that I love to cook for special occasions. But I don't always have time to devote to chopping, sauteing, and simmering. At the same time, I don't want to sacrifice flavor for the sake of convenience.

With this sauce in my foodie bag of tricks, I don't have to sacrifice a thing! This sauce is all natural. It contains tomatoes and olive oil imported from Italy, fresh onion, garlic, and basil. That's it...no hard-to-pronounce additives or icky ingredients. Just fresh ingredients cooked and quickly jarred. Rao's makes an entire line of pasta sauces, but the Tomato Basil is my favorite because it's so versatile.

Rao's is a legendary New York restaurant that's notoriously difficult to score a reservation for. They opened a second location in Caesar's Palace in Las Vegas a couple of years ago, which we dined at on our last trip there in 2007. The homemade version of the sauce we had at the restaurant was exactly the same as the sauce that we buy and use at home. 

Yes...I know what you're thinking: Rao's sauces are very pricy for jarred pasta sauce. The average price for a jar in my city is $8.99. I easily justify the expense by reminding myself that buying a jar of the sauce at my local grocery store and cooking at home is MUCH cheaper than a weekend trip to Las Vegas to eat at Rao's in Caesar's Palace ;)!


Thursday, June 4, 2009

Cookbook Spotlight: How to Cook Everything...and a bonus recipe!!

So...a work deadline kept me from posting in here yesterday, so I'm going to have a "make good" so I don't get behind!! Today is Cookbook Corner day...and I have a GREAT cookbook to recommend. I have a LOT of cookbooks in my collection...I love to try new recipes, so I love to have a lot of resources at my fingertips. This week's recommended cookbook is How to Cook Everything by Mark Bittman. It's a FANTASTIC resource for both beginner cooks and those who are a bit more experienced in the kitchen.

As the title says, the book is about how to cook EVERYTHING!! Mr. Bittman is a food columnist for the New York Times, and he really know his stuff!! This book has 900+ pages and features a whopping 1,500 recipes. The thing that I love most about this cookbook is that you learn specific details about different foods, are shown proper cooking technique via detailed illustrations, AND you also get some amazing recipes.

When I wonder, for example, "How should I cook leeks?" this is the book that I always turn to as a reference point to get me started. I'll find the section about leeks and learn what exactly they are, how to buy and store them, and how to best prepare them. Then the book lays out several recipes featuring leeks as the starring ingredient.

This cookbook should be a standard part of any cook's kitchen. If you don't own it, run out and buy it!!

...and I owe you a lightened-up recipe for yesterday. I'll share a salad so good that even my veggie-averse hubby will eat it and ask for seconds. It's very versatile, and we eat it year-round.

Wendy's Salad (for two)
Combine:
  • Organic field greens
  • 4-5 sliced strawberries (we sub in dried cranberries in fall/winter)
  • 1/3 cup chopped glazed pecans (or any glazed nut you have)
  • 1/3 cup crumbled feta cheese
  • Newman's Own Lighten Up Raspberry-Walnut vinaigrette
That's it...we have it on the side for dinner at least once a week. In summer, it also makes a great main dish salad with the addition of some diced grilled chicken breast.

Happy eating...and happy cooking!!

Tuesday, June 2, 2009

Restaurant Spotlight: ad hoc in Yountville, California

On our most recent vacation, we decided to dine at chef Thomas Keller’s ad hoc restaurant in the charming Napa Valley town of Yountville. We had read great things about the food and atmosphere, so we jumped at the chance to eat at a Keller restaurant. His French Laundry is among the top restaurants in the United States, but even two dedicated foodies like Michael and I just couldn’t justify spending $500+ for one meal…no matter how good it would be!

Ad hoc works like this: for only $49/person, you get a lovely four-course meal. The first course is a salad, the second course is your main dish, the third course is a cheese plate, and the fourth course is dessert. One set menu is served nightly…what they serve is what you eat, basically. We looked at it as an opportunity to sit back and let the staff feed us what was fresh and local that day. What a fun foodie adventure it was!!

Here is what we ate on the night when we dined at ad hoc.

First course: The first thing the waitress brought to our table was a yummy haricot vert and corn salad. It was served with shaved radish, caramelized leeks, and an avocado green goddess dressing. The combination of super-fresh veggies and a creamy dressing were just out-of-this world! It was a great start to our meal.

Main course: The entree that evening was a “study” in BBQ. We were served a plate of pulled pork, the most tender deboned beef short ribs, and a a few very spicy baby back ribs. The sides were baked borlotti beans and cole slaw. This is what I termed “upscale comfort food”. So good…we ate every bite of food on that plate!!

Cheese course: The cheese board that evening was a California blue cheese, homemade rosemary flatbread, and granny smith-caraway seed chutney. The cheese and flatbread were both stellar. However, I’m not a big fan of caraway seeds, so one bite of the chutney was enough for me.

Dessert: By the time dessert was served, we were getting pretty full. But not so full that we passed up the chance to dig into banana-nut cakes with coconut cream cheese icing. They were served with a deep chocolate drizzle sauce sprinkled with fleur de sel. The combination of the cake and bitter dark chocolate sauce was simply divine…not TOO sweet, and just the right portion.

I think that this was one of the best all-around meals I’ve ever eaten. The food was fresh, flavorful, and nicely presented. The restaurant was laidback, but not too casual…but not at all stuffy either! I subscribed to their e-mail list, so I receive their nightly menu every day. I’m not sure what’s worse: the drool that gets on the keyboard or knowing that I can’t jump in the car and eat there whenever I want!!

Monday, June 1, 2009

Happy Monday! Time for the Kitchen Spotlight. This week’s pick is Ziploc’s very cool Zip ‘n Steam bags. I bought a package of these bags months ago and have to admit that I threw them in the back of my kitchen cabinet…and forgot about them. I finally used them for the first time a few weeks ago. Now, I’m hooked! These steamer bags will be a staple in my kitchen from now on, I can promise you. What makes these bags so cool, you ask? First, steaming food is healthy for you. Second, you throw the bag away when you’re done…so there’s one less dish to wash. That’s a win-win scenario in my book!!
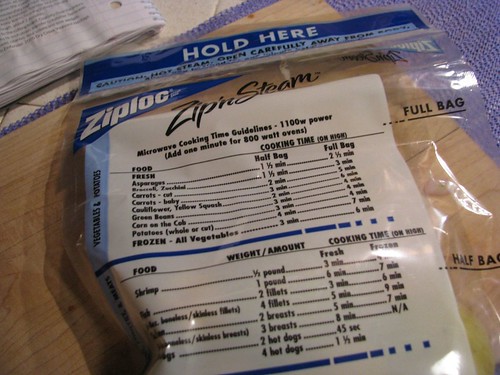
These bags are so easy to use:

1. Place your food and any seasonings in bag and seal firmly. Do not add water. Moisture in food provides sufficient steam. Spread items into an even layer. Do not overlap meats.

2. Lay steamer bag in microwave with indicated side up and cook using guidelines on bag. The bag inflates during cooking.

3. When the food is cooked, make sure to open the bag carefully, holding the top of bag where indicated.

So far, I’ve used these bags to steam corn on the cob and broccoli. Both came out perfectly cooked and yummy! I plan to branch out and try some of the recipes that are available at the Ziploc website this summer. You can find more info and recipes by going to http://www.ziploc.com/?p=b9 and navigating to the Zip ‘n Steam area.

I hope all of you will give these steamer bags a try…and let me know how you like them!

Sunday, May 31, 2009

Time for this week's Recipe of the Week! As promised a few days ago, today I'm sharing a super recipe for Grand Marnier French Toast that comes from 1801 First Bed and Breakfast in Napa, California! Michael and I stayed at this lovely inn for three nights in late April. Every morning, we started the day with a three-course gourmet breakfast. This was one the dishes we were served. 

The chef at the inn was kind enough to share the recipe with me so we can enjoy it at home!! Now I'm sharing it with all of YOU!! It takes a bit of time to get everything assembled and cooked, but I promise that it's well worth the end result! This is the perfect dish to serve for a lazy weekend breakfast...

1801 First's Grand Marnier French Toast 

Ingredients:
1 1/2 cups milk
3 large eggs
Juice of 1 medium orange
2 tbs. vanilla
2 tbs. Grand Marnier
1 tbs. sugar
1 tbs. lemon zest
1/2 tsp. cinnamon
Pinch nutmeg
Pinch salt
Brioche (8 slices per loaf)
Maple pecan granola, crushed to medium coarse (I bought this in the bulk section at Central Market)

Method:
- Whisk together eggs, milk, juice, vanilla, Grand Marnier, sugar, zest, cinnamon, nutmeg, and salt in a bowl.
- Soak bread slices in egg mixture for about 30 seconds.
- Pat granola on presentation side.
- Cook in mixture of butter and canola oil 3-5 minutes/side until crisp and browned. 
- Finish in a 350 oven for about 15 minutes...just enough time to make a smoothie and some bacon or sausage on the side...

Presentation:
- Slice each piece of french toast on a bias and set across each other.
- Serve with warm maple syrup.  I doctored mine by adding a bit of cinnamon, Grand Marnier, and vanilla to match the flavors of the toast...mmmm!
- You can also sprinkle with a bit of powdered sugar.
- The chef at 1801 First recommends serving with chicken apple sausages. I couldn't find those, but the butcher at Central Market recommended a yummy maple pork and blueberry sausage that was DELISH!

This morning we served the french toast with a simple smoothie on the side. The smoothie was made from a cup of frozen pineapple chunks, an organic banana, 1/3 cup fresh blackberries, six organic strawberries, 1/2 cup orange juice, and a container of blueberry yogurt. Healthy and so yummy...

Bon appetite, my friends :)!!!